The Swift Package Manager is a tool for managing the distribution of source code, aimed at making it easy to share your code and reuse others’ code.

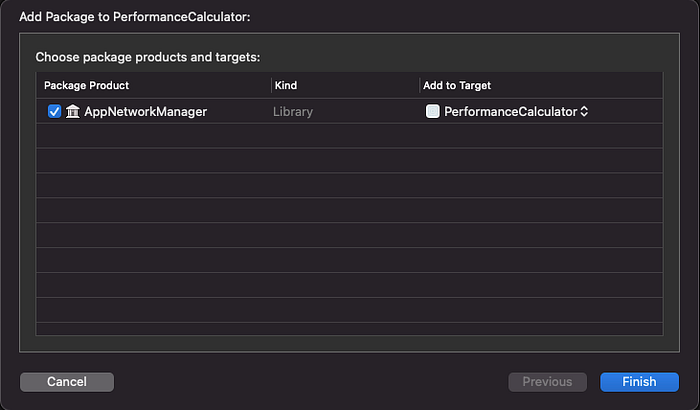
Here we gonna build a AppNetworkManager the package that has an internal dependency on another package AppDataSerializable.
Package Structure
Apple recommends using a specific folder structure for the package.
Sourcesfor the source filesTestsfor tests filesResourcesfor Assets, Xibs, Storyboards s and bundle-related things.


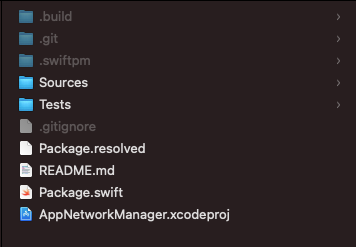
Now let's create the package by cd’ing to the desired folder followed by running swift package init . Doing this creates the basic things one package needs.
You can notice that we have got the .gitignore and README.md free of cost. No need to google or running towards older projects to find proper .gitignore.
Package.swift (== podspec)
The manifest file, called Package.swift, Inside it, we have to define all the characteristics of our package. Let’s create one for AppNetworkManager a package with the dependency of AppDataSerializable
Product Name
So AppNetworkManager chosen as the name of the package, which will be seen when we pull this package from our actual main application. Unlike cocoapods we can choose any name even if the package name is already taken by others. since our package is located under our GitHub repository, we are fine to use it ✌️
Platform
We are supporting AppNetworkManager packages from iOS 11, which can be configured under the package platform.
Dependencies
Here we can add our internal dependencies of AppNetworkManager which must be of another swift package. In our case, we are adding or AppDataSerializable as our dependency.
AppDataSerializble
AppDataSerializablepackage which helps in transforming the structure of network response.
You can find more details on AppDataSerializable here.
SwiftLanguageVersion (v4_2, v5)
This is the place where we can decide our swift version. we chose v5 as the basic swift version for the package.
Lets Build
All Done, open Terminal and run swift build , If everything went ok, you have successfully created your Package!


Package.resolved (== Podlock)
Once after running swift build , a Package.resolved (equivalent to podlock on cocoapods)the file will be created to let other developers, or even you, add the same version of the same dependencies to your app. If your project is under version control, you would usually push this file to the repository to keep the same dependencies on all the machines.
.Build
A .build folder will be created, where you will find everything related to Swift Package Manager. You will find all the dependency repositories and your executable app.
Lets Code
If you are using mac you can create an Xcode project for the package using this command swift package generate-xcodeproj
This will generate AppNetworkManager.xcodeproj in the package root folder. from now on, you can use Xcode to build and maintain your app.
Lets Publish (== Trunk)
To publish your package, create and push a version tag. You can use any either Xcode or terminal to publish your package.
Via Xcode
This is to the fellow developers who don’t know how to tag 😂
To create a new tag, choose
Branches -> Main -> Right Click -> Tag “Main” -> Tag version -> Create
To Push the tag
Xcode source control -> Push (don't forget to choose “include tags” while pushing the branch)


Via Terminal
To create a tag, check out the branch, commit your untracked changes, use the following commands to create one.
git commit -m “AppNetworkManager Initial Commit”
git tag 1.0.0
git push origin master — tags
“Be the senior engineer you needed as a junior.” — Someone
Thank you for reading the post, leave a comment with which you are using to make the code reusable 😎.